
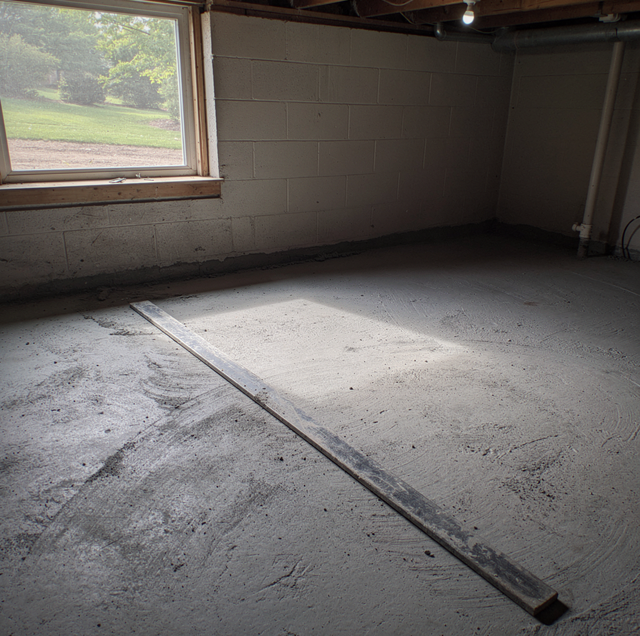
Your new floor is only as flat as the surface you set it on. A plank is stiff along its length, so where your subfloor dips, your plank bridges the hollow and your weight lands on a span with nothing under it. Your locking joints take that load, or your fasteners do, or your adhesive does, and one gives first.
Your crew corrects that surface before your first board is fastened, and that is the step you are asked to wait through. This picks up where your old floor is out, and your subfloor is bare. It works through what you feel under your feet when your floor went down over an uncorrected surface, and what your crew does before your new floor goes on.
The Symptoms Turn Up Months After the Last Board Went In
Nothing looks wrong the week a floor is finished. The trouble arrives in the second or third season, and it arrives as sound. You cross the same three feet of hallway every morning, and one day the floor gives back a hollow knock, a little lower in pitch than the boards around it. Step off that spot, and the noise goes away. Step back on it and the noise returns, in the same place, every time.
The other symptoms are quieter. A seam that sat tight all winter opens a hairline in July and closes again in October. A board near the middle of a room flexes a fraction under your heel while its neighbors hold firm. On a nailed hardwood floor you get a squeak that comes and goes with the weather, and the finish along one row wears thin while the rest of the room looks new.
Tile has no give in it, so it shows the same fault differently. A grout line crossing a low area cracks in a straight run, and the crack follows the shape of the hollow instead of the pattern of the room. In each case, the floor is doing what it was built to do. What changed sits underneath it, and it was there before the floor arrived.
What Hollows Out Under a New Floor?
A subfloor is never a plane. It is a surface with high areas and low ones, and the low ones carry this problem. A floating floor is a single locked sheet resting on its underlayment without being fastened to anything below, so it does not follow dips. It spans across it. The underlayment squashes a little at the edges of the low area, and past that there is air.
That air is the hollow you hear. Every step over it presses the plank down into the void and lets it spring back up, and the entire movement is carried by the locking profile at the board's ends and edges. The profile was shaped to hold two boards in the same plane and to stay there, not to work as a hinge a few thousand times a day.
Glued and nailed floors fail the same void differently. Adhesive needs contact on both faces to bond, and over a low area it never touched the underside of the board, so that stretch of floor is holding on only around its perimeter. A fastener driven where the subfloor falls away pulls the board down toward the dip and holds it there under tension, and a board held in tension works against its own fastener.
Each Kind of Floor Fails Its Own Way Over a Dip
On laminate and vinyl plank, the failure shows at the joints. A locking profile that has been flexing for a year loses its grip on the board next to it, and once one joint has opened, the boards on either side stop moving as a unit. You get a visible gap, a ridge where two board ends no longer sit level, and a click that travels along the whole run as you walk it.
Nailed hardwood carries the same load into its fasteners. A board that rocks against a nail widens the hole in the subfloor, and the squeak you hear is wood moving on steel. The hole never gets any smaller again. Cupping, crowning, and early finish wear trace back to the same root: a board that does not sit evenly on its substrate dries unevenly, wears through first where it stands proud of its neighbors, and takes daily traffic on an edge that was never shaped to carry it.
Tile and stone allow no movement. Set over a low area, the mortar bed thickens to fill the dip, cures at its own rate through that thicker section, and shrinks differently from the thinner bed beside it. The tile is rigid, and the grout is rigid, so the stress has one place to go: the weakest line in the assembly.
Flat Is Only Half of What a Subfloor Has to Pass
Flatness is the part you can see with a straightedge. Two other properties matter as much, and neither shows in a straightedge reading. The first is moisture. A concrete slab that looks dry and feels dry at the surface can still be sending water vapor up out of it, and that vapor has nowhere to go once a floor and an adhesive are sitting over the top.
Calcium chloride testing puts a number on that. A measured dish of anhydrous calcium chloride is sealed to the bare slab for a set period, and the weight it gains gives the moisture emission rate for that area of floor. Where the rate comes back too high for the flooring being installed, a moisture barrier goes down, and the flooring goes over the barrier.
The second property is structural soundness. A slab can be flat and still be dusting, delaminating, or cracked right through. A wood subfloor can be flat at rest and still deflect between its joists under a load. A national standard for preparing concrete floors to receive resilient flooring is written around that question, addressing whether a concrete floor is acceptable for resilient flooring.
Where Your Flatness Number Comes From
You will see flatness written as a deviation over a span, and both the span and the deviation change with the product going down. No single figure covers every floor, and a tolerance copied from one manufacturer's instructions is not evidence for another manufacturer's.
That standard is explicit on that point. It states that it does not supersede the resilient flooring or adhesive manufacturer's written instructions, and it sends the reader to the individual manufacturer. Every flooring maker prints its own tolerance, so the number your own job has to meet came in the carton with your flooring.
What a Crew Does to the High Spots and the Low Ones
The work begins with a survey, not with a machine. A long straightedge or a laser is walked across the floor in both directions and through the diagonals, and every place the edge lifts off the surface or leaves daylight under itself gets marked. Those marks are the map for the rest of the day, and they are never where anyone expected them.
High areas come off before anything is filled, because building up around a hump only makes the floor thicker. On a concrete slab that means grinding the high area down. On a wood subfloor it means sanding or planing the ridge until the straightedge lies flat across it. Grinding concrete carries the one serious hazard in this work.
Grinding high spots off a concrete subfloor releases respirable crystalline silica, which federal workplace-safety rules say can irreversibly damage the lungs; leave that step to a flooring crew whose grinder carries water delivery or vacuum dust collection.
Then the low areas are filled. The installing crew mixes leveling compound at the ratio on the bag, pours it within minutes of working time, and leaves it to cure as directed by the product. Wet compound burns skin and eyes on contact, which is why that crew does the mixing and pouring and keeps the room clear. Stand on that corrected surface before the first board lands, and you are looking at the only version of your floor that can still be changed, because the bare surface tells you what your finished floor will do before any of it is down.
Frequently Asked Questions
Some of one, yes. Every product allows a deviation, and inside that allowance your underlayment takes up the difference, and nothing happens. Past it, your plank spans open air, and your locking joints carry every flex of it. The allowance that applies to your floor is printed in its instructions.
You do not eyeball it. A straightedge laid across the floor rocks on a high spot and leaves daylight beneath itself at a low one, and a laser line picks up the same difference across a whole room at once. Your crew marks both kinds right on your bare substrate before any correction starts, so you can see them too.
Both do, corrected in different ways. Your wood subfloor is sanded or planed in the high areas and patched in the low areas, and a badly deflecting section needs work underneath it. Your concrete slab is ground and filled. The acceptance question is the same for you either way, and it is whether your surface is flat, dry, and sound.
It can, and the place you notice is a doorway or the top of your stair. Filling a low area adds thickness there, so the crew works out the finished height across your whole room before pouring anything. Where a threshold or an appliance opening is tight, that measurement takes precedence, and the correction is adjusted to fit it.
As long as the instructions say, and that varies widely. Some compounds take foot traffic in hours and flooring in a day; others want longer, and a thick pour takes longer than a skim. Your concrete slab may need a moisture test after the pour because the water that went into it has to leave before your floor is installed. The number you work to is on your bag.
The flooring waits. A slab above the emission rate your flooring allows keeps sending vapor up after the floor is over it, and it collects at the underside of the boards or along the adhesive line. What follows is the failure pattern you would blame on the flooring itself: a bond that lets go in patches, boards that cup across their width, and a finish that clouds. The remedy is a moisture barrier or more drying time for the slab, chosen off the test result, not the calendar. Flatness and moisture are separate acceptance tests, and your substrate has to pass both.
Book a subfloor assessment before your flooring order arrives — a flooring crew checks flatness, moisture and structural soundness across the whole floor, marks the high and low areas, and corrects them before the first board is fastened. Elite Edge Painting & Remodeling serves Parkville, Baltimore, and Towson. Call (443) 601-5233.
